
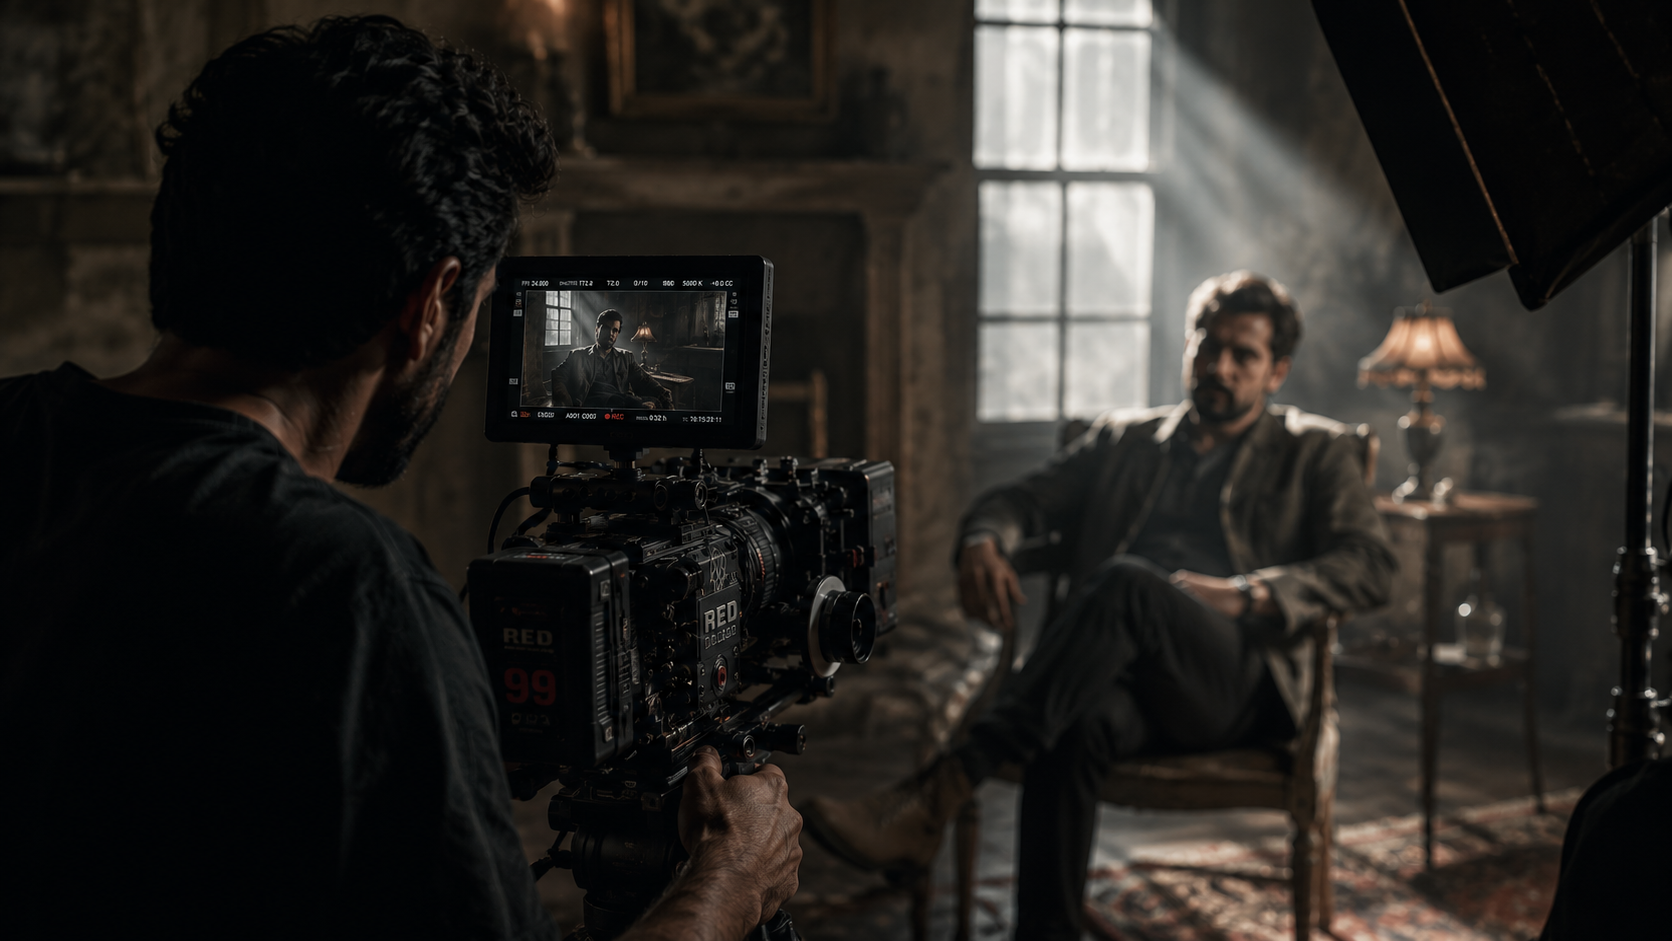
How to Get Cinematic-Looking Footage: A Practical Filmmaking Guide
A cinematic image is not created by a LUT or color grade alone.
The way footage looks starts long before post-production.
Lighting, composition, lens choice, camera movement, exposure, frame rate, production design, and the way you capture the scene all contribute to the final image.
Color grading can enhance those decisions, but it cannot completely replace them.
If you want better-looking footage, the best place to start is on set.
This guide explains the practical filmmaking decisions that can help you create more cinematic-looking footage without relying on complicated equipment or expensive cameras.
What Makes Footage Look Cinematic?
There is no single setting that makes footage cinematic.
A cinematic image usually comes from several decisions working together:
Lighting
Composition
Lens choice
Camera movement
Exposure
Frame rate
Depth of field
Production design
Subject placement
Color
Story and visual intent
The important point is that these elements work together.
A perfectly exposed shot with poor lighting and weak composition can still look uninteresting.
Likewise, a simple camera can produce beautiful footage when the lighting, composition, and storytelling are strong.
Start With Lighting
Lighting is one of the biggest factors affecting how your footage looks.
Before changing camera settings, look at the light.
Ask:
Where is the main light coming from?
Is the subject separated from the background?
Are the shadows intentional?
Is the background too bright?
Is the face evenly lit or does it have shape?
Does the lighting match the mood of the scene?
Good lighting does not necessarily mean using expensive lights.
Natural window light can work extremely well.
A single light source can also create a strong image when it is positioned carefully.
Use Directional Light
Flat lighting can make a scene feel visually simple.
Directional light creates shape.
Instead of lighting the subject equally from every direction, try creating a clear relationship between light and shadow.
For example:
Key light → Subject → Shadow side
This can create depth and help the viewer understand where to look.
Use the Background
Do not only light the person.
Look at what is behind them.
A darker background can help a brighter subject stand out.
A practical lamp, window, or small light source can also add depth to the frame.
Think about the entire image rather than only the face.
Create Depth in the Frame
One of the easiest ways to make a shot feel more cinematic is to create layers.
Instead of placing the subject directly against a flat background, look for:
Foreground elements
Subject
Background
Practical lights
Environmental details
This gives the frame more visual depth.
For example, you could shoot a person through a doorway, with the subject in the middle ground and lights or architecture in the background.
The camera does not need to be expensive.
The arrangement of the scene does a lot of the work.
Composition Matters More Than Camera Settings
Composition is how you arrange elements inside the frame.
Before pressing record, ask:
What should the viewer look at?
Then arrange the frame accordingly.
Useful composition techniques include:
Rule of thirds
Leading lines
Symmetry
Negative space
Foreground framing
Balanced backgrounds
Subject separation
These are not rules that must be followed in every shot.
They are tools for directing attention.
Use Negative Space
Negative space is the empty area around your subject.
It can create:
Isolation
Calmness
Tension
Scale
Direction
For example, leaving space in front of a person's gaze can make the frame feel more natural.
Avoid Distracting Backgrounds
Before recording, scan the entire frame.
Look for:
Objects growing out of someone's head
Bright areas competing with the subject
Distracting colors
Messy backgrounds
Unnecessary objects
Sometimes moving the camera a few inches can improve the shot more than changing any camera setting.
Choose Your Lens Carefully
Lens choice affects how the scene looks and how the viewer perceives the relationship between objects.
Wide lenses generally show more of the environment.
Longer focal lengths generally provide a narrower field of view and can make objects appear closer together in the frame.
Your choice should depend on the story and the space.
Wide Lenses
Wide lenses can be useful for:
Establishing shots
Small spaces
Environmental portraits
Dynamic camera movement
Showing the relationship between subject and location
Normal Focal Lengths
Normal focal lengths can provide a natural-looking perspective and work well for:
Interviews
Dialogue
Medium shots
General storytelling
Longer Lenses
Longer lenses can be useful for:
Portraits
Close-ups
Isolating subjects
Compressing the background
Creating more separation from the environment
Do not choose a lens simply because it produces shallow depth of field.
Choose it because it gives you the framing and perspective you want.
Use Depth of Field With Purpose
Shallow depth of field is often associated with cinematic images.
But blur alone does not make footage cinematic.
A shallow depth of field can help separate the subject from the background, but too much blur can also remove useful environmental information.
Ask:
Does the background help tell the story?
If yes, keep some of it visible.
If the background is distracting, reducing depth of field may help.
The goal is controlled focus, not maximum blur.
Get Your Exposure Right
Exposure affects the entire image.
Before recording, check:
Highlights
Shadows
Skin
Background
Overall brightness
Do not rely only on the camera's LCD screen.
Use the exposure tools available on your camera when possible.
Depending on the camera, these may include:
Histogram
Waveform
Zebra
False color
Light meter
The correct exposure depends on the camera, recording profile, lighting, and intended workflow.
This is especially important when shooting Log footage.
Log does not give you permission to ignore exposure.
Understand Frame Rate
Frame rate describes how many frames are captured or displayed each second.
Common frame rates include:
24 fps
25 fps
30 fps
50 fps
60 fps
100 fps
120 fps
The appropriate frame rate depends on the project, camera, region, delivery format, and creative intent.
24 fps is commonly associated with traditional cinematic motion, while higher frame rates can provide smoother motion or be used for slow-motion workflows.
Do not choose frame rate simply because a higher number sounds better.
Choose it based on what you want the motion to look like.
Understand Shutter Speed
Frame rate and shutter speed are closely related.
A commonly used starting point for natural-looking motion is a shutter speed around twice the frame rate.
For example:
24 fps → approximately 1/48 second
30 fps → approximately 1/60 second
60 fps → approximately 1/120 second
This is a starting point, not a universal rule.
Different shutter settings can be used intentionally for creative effects, action, special situations, or different camera systems.
The important thing is understanding how shutter affects motion blur and exposure.
Do Not Shoot Everything in Slow Motion
Slow motion can look impressive, but using it everywhere can make the sequence feel less natural.
Use higher frame rates when you have a reason.
For example:
Sports
Dance
Action
Emotional moments
Dramatic movement
Detail shots
For normal dialogue or everyday movement, real-time frame rates may be more appropriate.
Use Camera Movement With Purpose
Camera movement should support the scene.
Common movements include:
Pan
Tilt
Push-in
Pull-out
Tracking
Dolly
Handheld
Static shots
The most important question is:
Why is the camera moving?
A camera movement can reveal information, follow a character, increase tension, or create energy.
Moving the camera simply because you have a gimbal does not automatically make a shot cinematic.
Static Shots
Static shots can create:
Stability
Calmness
Tension
Observation
Intimacy
Do not underestimate a locked-off camera.
Sometimes the strongest choice is not moving at all.
Push-In
A slow push-in can gradually increase emotional intensity.
It can be useful when:
A character realizes something
Tension is increasing
A dramatic moment is approaching
Tracking Movement
Tracking can follow a character through an environment and help the audience experience the scene with them.
The movement should feel motivated by the action.
Shoot Sequences, Not Random Shots
One of the biggest beginner mistakes is collecting beautiful individual shots without thinking about how they will edit together.
A better approach is to capture a sequence.
A basic sequence might include:
Wide shot
Medium shot
Close-up
Detail shot
Reaction shot
Movement shot
This gives you more options in the edit.
It also helps establish where the viewer is and what is happening.
Think About Shot Sizes
Different shot sizes communicate different information.
Wide Shot
Shows the environment and establishes location.
Medium Shot
Shows the subject while retaining some environmental context.
Close-Up
Focuses attention on the subject's face or an important detail.
Extreme Close-Up
Highlights a very specific detail.
The best shot size depends on what the audience needs to understand at that moment.
Use B-Roll Intentionally
B-roll is secondary footage that supports the main action or dialogue.
It can be used to:
Establish a location
Show details
Cover edits
Add context
Improve pacing
Create visual variety
For example, during an interview about filmmaking, B-roll could show:
Camera setup
Hands operating the camera
Lens changes
Monitor screens
Location details
People working on set
Good B-roll is not just random footage.
It should contribute something to the story.
Hold Your Shots Longer
A common beginner mistake is stopping the recording too quickly.
Give yourself enough footage to make the shot useful in the edit.
When shooting B-roll, hold the camera steady for a few seconds before and after the important action.
This gives the editor more flexibility.
It also makes transitions easier.
Pay Attention to the Background
A strong subject can still be ruined by a distracting background.
Before recording, check:
Bright windows
Random objects
Signs
Clutter
Strong colors
People moving behind the subject
Sometimes changing the camera angle is enough.
Other times, move the subject.
Do not always try to fix a bad background in post-production.
It is often easier to fix it on set.
Use Color Intentionally on Set
Color grading happens in post, but color decisions begin during production.
Look at:
Clothing
Walls
Props
Practical lights
Background colors
Skin tones
Natural environment
If every element in the frame has the same visual weight, the image may feel flat.
Instead, think about color relationships.
For example:
Warm subject + cooler background
or
Muted environment + controlled accent color
You do not need extreme teal-and-orange colors to create separation.
Subtle relationships can work better.
Shoot With the Final Grade in Mind
If you plan to color grade the footage heavily, make sure the camera settings and exposure support that workflow.
For Log footage, understand:
Gamma
Color space
Exposure
Codec
Bit depth
Color-management workflow
Do not simply choose Log because you want a cinematic image.
Log is a recording and post-production choice, not a cinematic look by itself.
Avoid Over-Relying on LUTs
A LUT can help create a look or perform a technical transformation, but it cannot fix every problem created during production.
If the footage has:
Bad exposure
Poor lighting
Incorrect white balance
Distracting composition
Motion problems
a LUT will not magically solve those issues.
A strong image should begin on set.
Then color grading can enhance it.
Camera Movement vs Image Quality
You do not need a gimbal for every shot.
A tripod, handheld camera, monopod, slider, or simple shoulder setup can all be useful.
Choose the tool based on the movement you want.
For example:
Tripod → controlled and stable
Handheld → intimate or energetic
Gimbal → smooth movement
Slider → controlled lateral movement
Dolly → physical camera movement through space
The equipment is secondary to the intention.
Create Separation Between Subject and Background
Subject separation can come from more than shallow depth of field.
You can create separation through:
Lighting
Contrast
Color
Distance
Focal length
Composition
Depth
For example, a subject can stand out against a dark background even when the entire frame is sharp.
Likewise, a bright subject against a darker environment can immediately attract attention.
Think about separation as a visual relationship rather than simply "background blur."
Plan Your Shoot
Better footage often comes from better preparation.
Before shooting, think about:
Location
Time of day
Available light
Camera position
Lens choice
Movement
Shot list
Audio
B-roll
Final delivery
A simple shot list can save a huge amount of time during editing.
You do not need to plan every frame.
But you should know what the scene needs to communicate.
The Cinematic Look Starts Before the Camera Rolls
One of the biggest misconceptions about cinematic footage is that it comes from a particular camera.
Camera choice matters, but it is only one part of the image.
A professional camera cannot automatically create:
Good lighting
Good composition
Good storytelling
Good camera movement
Good production design
Those decisions come from the filmmaker.
A simpler camera used with thoughtful lighting and composition can produce a stronger image than an expensive camera used without visual intent.
A Practical Cinematic Shooting Workflow
Before pressing record:
1. Decide What the Scene Should Feel Like
Is it:
Calm?
Dramatic?
Intimate?
Energetic?
Mysterious?
Warm?
Cold?
2. Shape the Light
Decide where the key light comes from and what the shadows should look like.
3. Choose the Frame
Decide:
Wide
Medium
Close-up
Detail
4. Choose the Lens
Select the focal length based on the desired perspective and framing.
5. Set the Frame Rate
Choose the frame rate based on the intended motion and delivery.
6. Set Shutter
Choose a shutter speed appropriate for the frame rate and desired motion blur.
7. Check Exposure
Use your camera's available exposure tools.
8. Check the Background
Remove distractions and look for opportunities to add depth.
9. Add Motivated Movement
Move the camera only when the movement serves the shot.
10. Capture Coverage
Shoot wide, medium, close, and detail shots where appropriate.
11. Capture B-Roll
Get supporting footage that helps tell the story.
12. Review the Scene
Before leaving the location, check whether you actually have enough usable footage.
Common Filmmaking Mistakes
1. Thinking a Camera Creates the Cinematic Look
A camera records the image.
The filmmaker creates the image.
2. Using Shallow Depth of Field Everywhere
Blur can help isolate a subject, but it should not replace composition.
3. Moving the Camera Constantly
Movement without purpose can make footage feel distracting.
4. Ignoring Lighting
Even expensive cameras struggle to make poorly controlled lighting look intentional.
5. Shooting Without Coverage
One beautiful shot may not be enough to edit a complete sequence.
6. Shooting Too Much Slow Motion
Slow motion is a creative tool, not a default setting.
7. Ignoring the Background
The background is part of the composition.
8. Fixing Everything in Post
Color grading and editing can improve footage, but they cannot completely replace good production decisions.
Final Takeaway
Cinematic footage is not created by one camera setting, one lens, or one LUT.
It is created through a combination of deliberate decisions.
Lighting → Composition → Lens → Exposure → Motion → Frame Rate → Coverage → Color
Start by making the image work in camera.
Then use editing and color grading to refine it.
If you develop the habit of thinking about light, framing, movement, and storytelling before pressing record, your footage will improve regardless of which camera you use.
The goal is not to make every shot look like a movie.
The goal is to make every visual decision serve the story.
Frequently Asked Questions
What makes footage look cinematic?
Cinematic footage usually comes from a combination of lighting, composition, lens choice, exposure, camera movement, frame rate, depth, production design, and visual storytelling. There is no single camera setting that creates a cinematic image.
Do I need an expensive camera to shoot cinematic footage?
No. Camera quality matters, but lighting, composition, lens choice, exposure, and storytelling often have a major impact on the final image.
What frame rate should I use for cinematic footage?
24 fps is commonly used for cinematic projects, but the best frame rate depends on the project, camera, delivery format, and intended motion. Higher frame rates can be useful for smoother motion or slow-motion footage.
What shutter speed should I use for video?
A common starting point is a shutter speed approximately twice the frame rate. For example, 24 fps can be paired with approximately 1/48 second. The exact choice depends on the desired motion blur and shooting conditions.
Does shallow depth of field make footage cinematic?
Shallow depth of field can help separate a subject from the background, but it does not automatically make footage cinematic. Composition, lighting, lens choice, and storytelling are equally important.
Is a gimbal necessary for cinematic footage?
No. A tripod, handheld camera, slider, dolly, or gimbal can all be useful. The right choice depends on the movement required by the scene.
Does color grading make footage cinematic?
Color grading can enhance the visual style, but it cannot completely replace good lighting, exposure, composition, and production decisions made during filming.
Should I shoot Log for cinematic footage?
Not necessarily. Log can be useful when you plan to grade the footage, but it also requires an appropriate exposure and post-production workflow. A standard profile may be more practical for projects requiring a fast turnaround.
How can I make my B-roll look cinematic?
Think about B-roll as part of the story. Use different shot sizes, controlled movement, interesting compositions, useful details, and enough clip duration to give the editor flexibility.